My friend Erik recently planted a new vegetable garden at his new house, but now he’s off traveling. So right before he left I helped him install drip irrigation that will take care of his plants while he’s gone — and beyond.
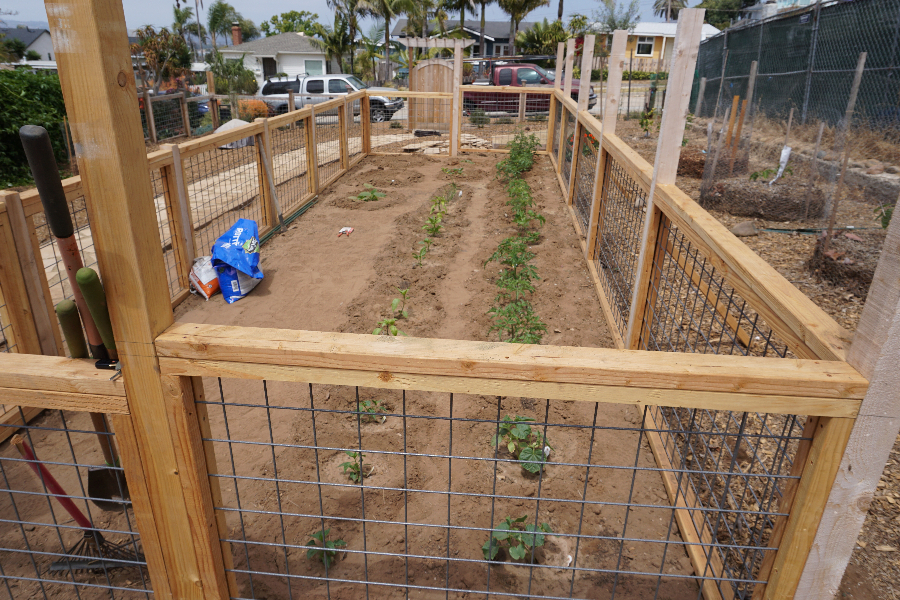
Here’s what his garden looked like before the installation:

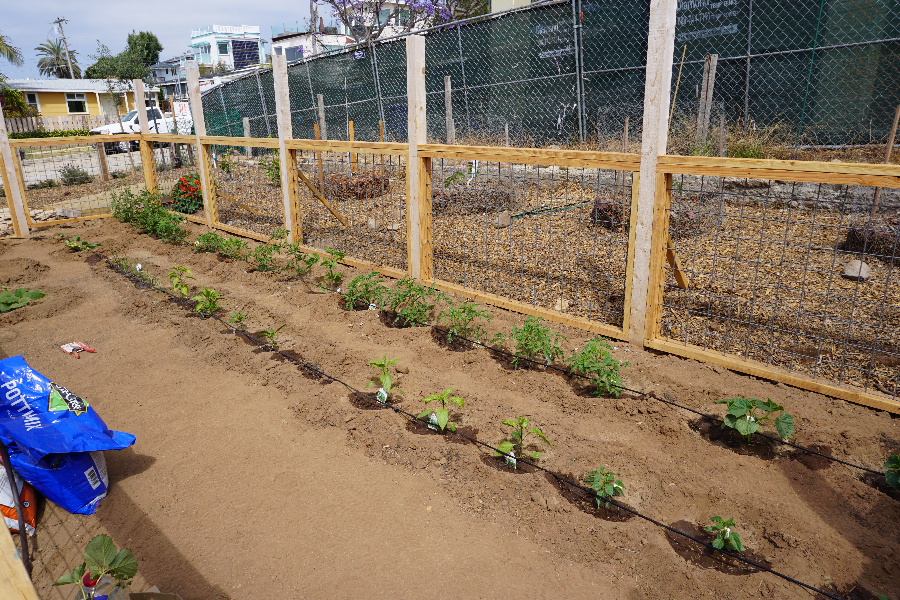
And here is what the garden looked like after the install, with the new irrigation running:

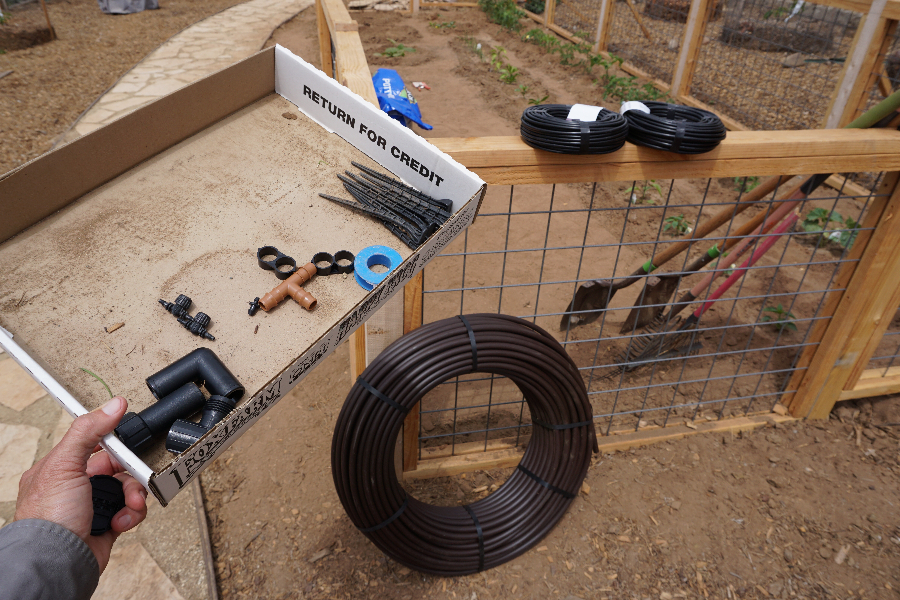
It occurred to me that you might also want to set up a drip system for your vegetables or be curious to see how we set up Erik’s so we filmed some of the work. I didn’t cover every single step; rather, I showed the most important steps and noted a few techniques to make the process go smoothly.
Have a watch:
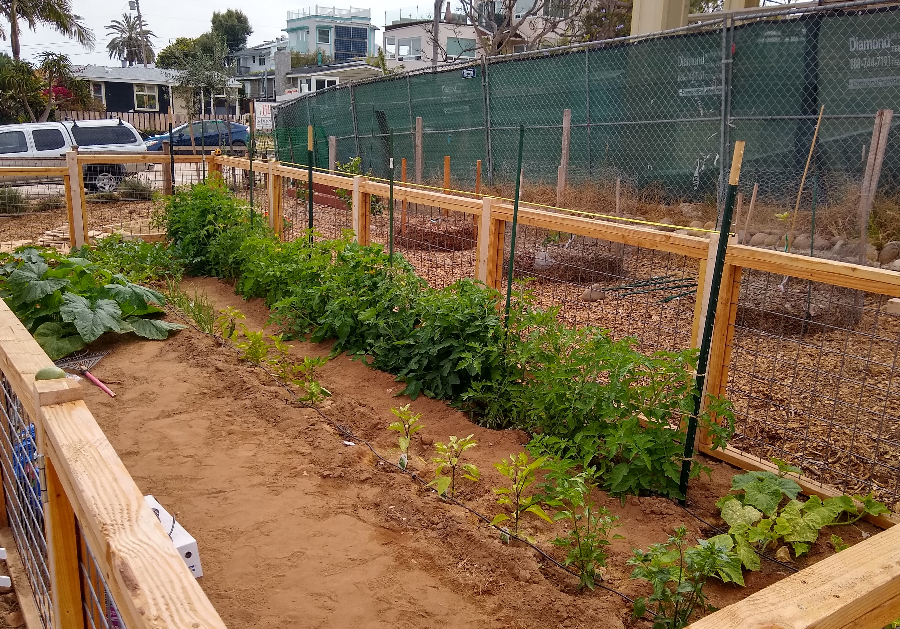
Here is Erik’s garden on June 12, a couple weeks after the drip installation. It grew very well while he was out of town:

Have any questions? Ask in the comments below.
For more on how to run a drip system automatically, see this post: “The easiest automatic irrigation.”
For how long and often to run drip on vegetables, see this post: “How long to run drip irrigation on vegetables.”
All of my Yard Posts are listed HERE
Thank you Supporters for paying the bills and allowing me to spend time creating posts like this one about Erik’s veg garden drip system. I’d love to have your support too. Learn how HERE


thanks for the video! helpful:) wondering what mulch your friend will use in that portion of the garden? In the background it looked like wood chips were being used…as I do in my garden. But with my tomatoes, I haven’t committed to a specific mulch yet. In this garden, the tomatoes and peppers are laid out a lot like mine so I am curious what works for your friend. Thanks!
Hi Gene,
He plans to put down a bunch of compost as mulch there.
So I have done that, too, other years. But now I’m rethinking: assuming there’s microorganisms in the compost, how will they survive if I dump them on top of sandy soil (no food there) and under the hot sun (top inch or so of my soil is quick to dry out in between watering). Maybe there’s a cheap and easily available organic mulch to put on top of the compost? The straw I have found near me seems expensive at around $15 per bale. We don’t have much leaf litter from our fruit trees so no mulch there. Ideas?
Hi Gene,
What I personally do is spray my vegetables down with a hose about once per month in the summer in order to wash off foliage (I live on a dirt road so plants get covered in dust) and to moisten the compost below. That helps maintain microbe activity in the surface compost and soil, I figure.
But if you scratch around you find that the water from the drip emitters alone spread into the compost (between the emitters) surprisingly widely. Also, keep in mind that the roots of your vegetable plants are only going to be growing where they’re getting water from the drip emitters so it doesn’t matter much if the microbes elsewhere die off or have low activity during the non-rainy season.
For cheap and easily available mulch… get in contact with a tree trimmer working in your area. They have plenty of woodchips by the truck load and they are looking for a free place to dump them. I have stopped and talked with different crews in the past when I happen to see them working. Usually they are more than happy to dump their truck load at my place.
Another modern way to accomplish this is sign up for a chip drop at http://www.getchipdrop.com
For the really big truck loads, fortunately , I have an area where the pile can sit for a year and cook while it turns to wonderful compost without lifting a finger. It does not matter what kind of tree or bush it was, it all turns to compost eventually. Along the way the tougher fibrous stuff just makes great mulch!
How did you step down the city water pressure to be compatible with the drip system?
Hi T,
Not shown in the photos or video is that behind the riser is a valve with a filter and pressure regulator attached. The regulator reduces the pressure to 15 PSI.
Also, remember to setup a routine to check these type of systems, I’ve had intermittent issues with critters chewing these tubes and creating issue with downstream plants. I’m a heavy mulcher and the water doesn’t go to waste in my system, but some of the plants down the line get the short end of the stick and could suffer if you don’t keep an eye out. On a hill side in Whittier.
Hi James,
I agree. Good reminder. I find it best to set the timer to run the system when I am likely to be around to watch it for exactly the reasons you mentioned. And I don’t bury most of my drip lines under mulch for the same reason. I wrote this post about that: https://gregalder.one/yardposts/what-is-the-best-time-of-day-to-water-your-plants/
Hello Greg, 2 comments. I installed a Rachio WiFi controller to water my yards. Started using this product at a commercial property over 10 years ago.
And one other note regarding Serrano farms, Matt has a few videos about the issues with drip irrigation and maintaining healthy microbes beneath the surface. Well worth a watch. Soupy
We moved to Poway this year and are setting up a garden. I noticed your friends garden fencing in the May article about setting up garden irrrigation looks really great. Did he built or purchase it? Any info you could provide would be great.
Hi, Jenny.
The fence is hogwire and cedar.
Cedar 4×4 posts frame the hogwire vertically.
Cedar 2x4s run horizontally above and below the hogwire.
Then, what are essentially 1.5×1.5s (cut from 2x4s), hold the hogwire in place.
I’ll see if Greg can add some more pictures if that helps.
Thanks! That was really helpful information. We got delayed and are finally mapping out and building our garden area now. We are planning on building the same fence. It looks sharp.
HI Greg, Another great informative post. Wondering your thoughts/opinion on drip tape vs tubing?
Hi Mariangela,
I’ve never used drip tape. I know good vegetable growers who do though. It seems to have a few advantages for them, such as being cheaper and easier to store when not in use. But tubing is tougher and can be set up with curves (not just straight lines).
Suggestion – run your 1/2″ tubing halfway down the length of the garden. Then attach the 1/4″ tubing there to a 1/4″ tee and run the drip tubing to the ends of each run of veggies. That will maintain the pressure more evenly in the 1/4″ tubing. Also, since you have many drippers you can raise the water pressure 5 or 10 psi.
Another option would be to run another length of 1/2″ tubing all the way to the far end and connect the 1/4″ dripper tubing ends to the 1/2″ line, so the volume of water flows into both ends of the 1/4″ dripper tubing.
Greg, have you done an article on grey water systems? Water being a bigger and bigger issue in Ca, it would make for an interesting read.
Hi Dan,
The only graywater post I’ve written is about laundry water: https://gregalder.one/yardposts/reusing-laundry-water/
I’ve done so many presentations on graywater though; I don’t know why I haven’t written more posts on the topic. Maybe it’s because the sensible reuse of household water is so dependent on how your house is built and who lives in it, not to mention how legal you want it to be.
Let me know if there’s a narrow topic within graywater that you’d like me to write about. I’ve got some experience with everything except the fancy, expensive whole-house systems.
Or maybe I can just write about what I currently do.
I was thinking something fairly narrow. Do’s and don’t. Pump? Gravity fed? Storage. Drip or sprinklers. Costs. Is a plumber needed?
I’m thinking about just doing laundry water reuse because I won’t need that much (4 trees once they are all ready o go into the ground. And my current hillbilly manual watering system is pretty jenky.
Does the thin 1/4″ tubing have drip holes in it from the factory? Or do you make the penetrations in the tubing specifically where the vegetables are?
Hi Guy,
Yes, the 1/4 tubing comes with emitters built in. But you can get the emitters at different spacings. On my vegetables these days I’m using 9-inch spacing.